Monday, July 30, 2012

Using Rice to Clean Bottles

Original Source: Rice as Vase Scrubber

Prepare a stained vase for a new batch of blooms. If you can't reach the residue at the bottom, add a tablespoon of rice and a lot of soapy water, shake, and rinse until clean.


Me: I started doing this a few years ago, and it is really amazing.  It works with any kind of bottle, including baby bottles.  We use it now with cleaning our water bottles.  You know how they get residue stuck in the bottom and it’s a pain to clean.  Not any more!  Try it!

Friday, July 27, 2012

Make your mascara last longer

Original Source: How to Make Your Mascara Last Longer

  • Add 4-5 drops of saline solution (for contacts) to your mascara bottle.
  • Insert the wand and stir!

Me: This works!  After I saw this pin, I tried it and my mascara was like new!  I have done this many times since.  It gives weeks of life to your mascara.  It’s truly amazing.  Try it out!

Wednesday, July 25, 2012

Bubble Snake Maker

Original post: Bubble Snake Maker

1.  Gather your supplies ~ an empty plastic bottle, a piece of terry cloth fabric and a rubber band.

2.  Cut the bottom off your plastic bottle and cut your fabric into a circle.

3.  Assemble your Bubble Snake Maker by putting the fabric over the open bottom of your bottle and securing it with the rubber band.

4.  Put some dish detergent in a bowl and add a little bit of water.  Dip your Bubble Snake Maker in and you're ready to go!

5.  Have fun making your Bubble Snakes!!  After dipping into the soap mixture, gently blow into the mouth of your bottle.  A slow, gentle stream of air will create a long chain of bubbles.  ( Just don't inhale, or you might get a mouthful of bubbles ~ yuck! )


Me: I admit, I was pretty skeptical about this, but take a look…

100_3983

It worked!  My kids had a lot of fun playing with these.  I didn’t cut the rag because I still wanted to use them.  Then I thought, what if we used bubble solution instead of dish soap?

100_3992

They did not work as well.  They were sufficient, but after seeing the dish soap bubbles, they weren’t as impressive.  I would stick with the dish soap.  This is something that even young children can do.  It’s a definite hit around here, and we will be doing it again.

Monday, July 23, 2012

Cleaning Silver

Original Source: How to Clean Silver with Aluminum Foil

I lined the sink with aluminum foil, the bottom and up on all sides. Then I poured a half-cup of ordinary table salt and a half-cup of baking soda into the sink; filled it with boiling hot water, and dropped in the silverware. I left it in the water for about a half hour.  


Me: I have heard about this for years, but I am so skeptical about these kinds of things.  It “magically” takes away the tarnish?  Yeah, right.  So I thought this would be a great time to try it out. My silver is from an antique store, which my hubby found for me about 5 years ago.

Before pictures:

IMAG0209IMAG0210

After:

IMAG0222IMAG0216IMAG0221

I am THRILLED!!!!!  I didn’t even let it soak for 1/2 hour, only about 5 minutes.  I did take a rag and wipe down each piece.  A couple I had to wipe hard, because the tarnish was heavier in the design on the end.  But for about 1 1/2 hours of work, I got this entire set of silver cleaned. 

I will definitely be doing this again!

Friday, July 20, 2012

Fake Makeup for your daughter

Original post: Faux Makeup

Just wash out your old makeup containers with soap and water, and let them dry thoroughly.
Then, (once you've gotten some cheap Dollar Store nail polish, or use some that you don't use as much anymore), just slowly pour it into your containers where the makeup used to be.

I say slowly because you don't want to accidentally pour out the little mixing beads that are inside. Also, before pouring shake the polish well, but then let it sit for a minute so the air bubbles can rise and pop and not mess up your "makeup."

You can use as much as you want, but as the polish dries, it shrinks, so it will actually look like about half of what you pour in. It takes a full 24 hours for the polish to dry, but I waited another few days since it was still pretty stinky (didn't want the kiddos getting high off it), and to make sure it was thoroughly set.

Don't forget to let it dry in a well ventilated area, away from bugs that might get stuck in it. Also, this is probably a craft to do without your kids since, (a) there are lots of fumes & (b) they can't really help much and they can't even play with it for 3 whole days!!!


Me: I had so much fun making this.  I made eye shadow, blush, and pressed powder.

IMAG0202IMAG0203IMAG0204IMAG0205

I got my containers from the dollar store, and just dug out the real makeup, then cleaned the containers. I bought the nail polish from the dollar store as well. I did several layers because it shrunk so much when it dried. And it did take several days for it to dry hard.

The Princess loves playing with this, and I love that she isn’t wearing real makeup.  I don’t like her wearing the real stuff yet, not even for dance recitals.  I want her to stay looking like a little girl for as long as possible!

Wednesday, July 18, 2012

The Best Way to Cut a Watermelon

Original Source: The Best Way to Cut a Watermelon

Step #1:  Cut the melon in half

Step#2: Cut the end off one of the halves.

Step #3:  Place the melon face down on your cutting board.

Step #4:  This is the tricky part. Angle your knife and start cutting off the rind.

Rotate the melon and remove the rind all the way around.  Important tip:  You will be tempted to only remove the white part  and get as close as you can to the red, while saving the precious red part of the melon.  BUT – if you don’t remove enough, then you will taste the bitter/sour flavor of the rind.  In my experience, it is best to not only cut off all of the white rind, but cut slightly into the red part.  Trust me.  You will love your watermelon this way.

You have now finished the hardest part.  The rest is a breeze.

Step #5:  Slice horizontally into 3 sections.

Step #6: Cut into pieces – whatever size your prefer.

Now chill in your fridge and enjoy some ice cold juicy watermelon!


Me: I have to admit, I have been cutting my watermelon this way for quite some time.  In fact, I cut all my melons this way.  It is so simple, and much easier to eat.  I hate eating it cut into triangles.  It always gets all over my cheeks.  This is an easy way to make it clean to eat.

Here are my pictures:

100_3922100_3924100_3930100_3937100_3942100_3945100_3955100_3957

Now we can serve up watermelon into bowls, and eat it without getting the juice all over our faces or clothes.  This is a great idea!

Monday, July 16, 2012

Baked Bacon

Original Post: Less-Mess Bacon
This spatter-free technique puts the "bake" back in bacon. Preheat the oven to 400 degrees. Line 2 rimmed baking sheets with parchment paper, then lay the bacon strips flat, making sure pieces do not overlap. Bake until crisp and browned, 15 to 18 minutes, or desired doneness, rotating the sheets once. Transfer strips to a paper towel to drain.

Me:  I love this trick.  The best part is it’s not really a secret…the directions are right on the back of the bacon package!  Now, a couple of things.  I didn’t put down parchment paper…or foil…or a rack.  I just laid the bacon on the pan.  And I didn’t want to get 2 pans dirty, so I just overlapped the pieces a bit. 
100_3959
This is the bacon when I took it out of the oven.  I like my bacon chewy, not crispy.  Just bake it to the doneness you like.  When you take it out of the oven, pull it off the pan and onto a plate lined with paper towels to soak up the grease.  No grease splatters or burns!
100_3960
I can’t find the original pin for this following idea, but it’s brilliant!  Line a bowl with foil.  After you take the bacon off the pan, pour the grease into the foil.  Now you can clean your pan right away, and it’s not baked on.  Easy clean up. But…
100_3961
Leave your bacon grease overnight and let it harden.  Then…
100_3962
Fold up the edges of your foil and throw the whole thing away.  Super easy clean up, and your bowl is still clean!  I love doing this!  Whoo Hoo for easy clean up!
100_3963
So I love both of these pins and I will continue to use them from now on.

Frugal Firestarters

Original Post: Frugal Firestarters

Materials:
  • Egg cartons, the grey recycled-cardboard kind, NOT the foamy plastic kind
  • Dryer lint, enough to fill the number of egg cartons you are using
  • An old candle (you know, the ugly half-burned kind– or buy a new one at the dollar store)
  • Some kind of double boiler suitable for melting wax
Procedure:
1. Melt the candles over a medium heat on the stove using some kind of a double boiler. I don’t have a real double boiler, so I use a medium sized metal mixing bowl set inside a large pot. A small pot inside a large pot will also work. Fill the large pot with a few inches of water, then set the bowl or smaller pot into it.  Put the candles in the inner bowl to melt.  (Do NOT try to melt wax in the microwave– you will regret it.)
2. While you’re waiting for your candle to melt, pack each compartment of your egg carton with a blob of dryer fuzz. Cram it in fairly compactly, but there’s no need to be too fussy.
Wax  and lint cooling in egg cartons
3.  When the candle wax is completely liquid, pour the wax carefully over the lint in each compartment of the egg carton.  Use just enough wax to moisten the lint.  You don’t want to completely submerge the lint in wax, just wet it down with the wax– I’d guess it takes a couple of tablespoons of liquid wax in each compartment.
4.  Let cool. Store away from heat.   To use, tear off one compartment at a time, light with a lighter, and set under wood in fireplace.
One firestarter, ready to light and stick in the wood stove
Disclaimer:  I am assuming all y’all are smart and are going to use normal precautions around hot wax and fire.   OK?  Good.
Getting a fire started is sometimes tricky, especially if you don’t have much kindling handy, and these things work great. Light an edge of the egg carton, stick it under a heap of wood in the fireplace, and it will burn for 3 or 4 minutes, plenty long enough to get most fires going.

Me:  Okay, this one really works!  My boys have taken them on Scout camps and they are perfect for getting the fire going.  The leaders also have fun playing with them!
But I found an even easier way. 
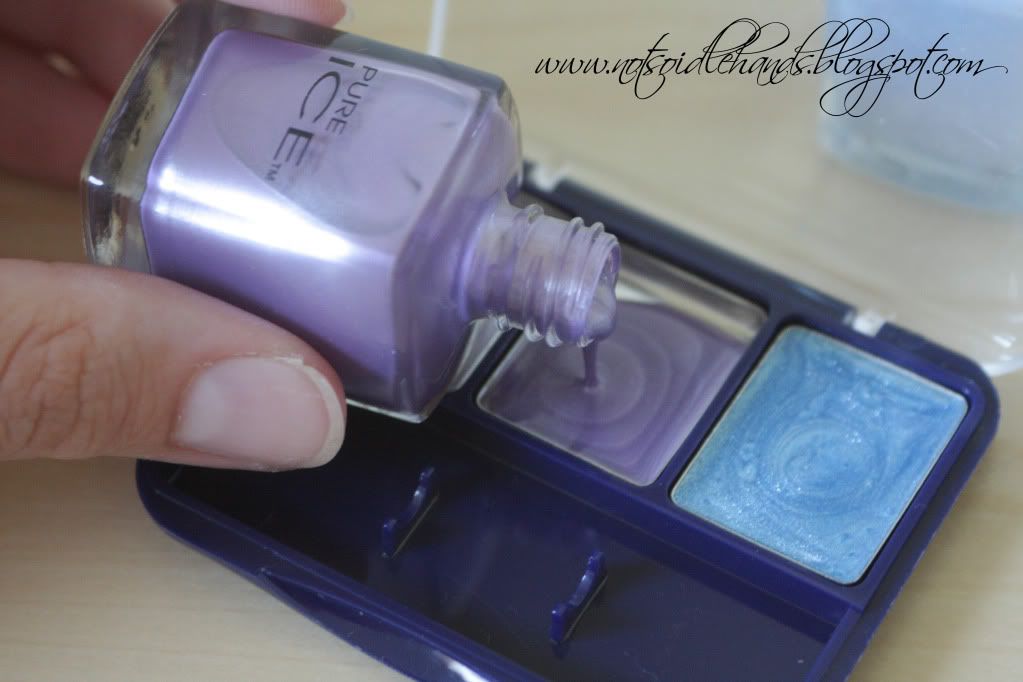
Have you heard of Scentsy?  They are a wickless candle system, where you melt the wax in a warmer and it releases the scent without the danger of a flame.  I love it!
Anyway, after the wax has released all it’s scent, I used to just dump the wax in the garbage.  Not anymore.  I keep the egg carton filled with lint on top of my refrigerator and when it’s time to change out the wax, I pull the egg carton down and pour the melted wax into one of the compartments of the egg carton.  It’s a win-win!
Also, because they light easily and burn for quite a while, to give you time to get your fire going, they are great to put in your emergency kits.
I highly recommend doing this.